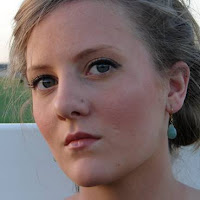
In this lesson, we learnt about air brushing, and how to change certain features of a person, for example eye colour and hair colour. We did this on Photoshop, using many tools such as cloning, the eraser tool and changing the opacity.
(Top image was before, and the bottom image is after).
As you can see, I have changed many features of this woman. Firstly, I have airbrushed her skin, and removed any imperfections using the cloning tool. I added another layer and used the Gaussian blur tool to make her skin smoother. I then erased the eyes, lips, nose ring and earring from the new layer, so that it appears much sharper. This makes the image look much more realistic, and it appears that she does in fact have skin this smooth.
I then changed the eye colour to a darker blue. I added a new layer and used the Select tool to outline her eyes. I then coloured them in with a dark blue using the paint tool. To make them appear much more realistic, I changed the layer style to Overlay, which made the colour a lot more transparent and subtle.Lastly, I changed the hair colour to a lighter blonde. I did this the same way as I did with changing the eye colour, except I coloured it in with a yellow colour.
I then changed the eye colour to a darker blue. I added a new layer and used the Select tool to outline her eyes. I then coloured them in with a dark blue using the paint tool. To make them appear much more realistic, I changed the layer style to Overlay, which made the colour a lot more transparent and subtle.Lastly, I changed the hair colour to a lighter blonde. I did this the same way as I did with changing the eye colour, except I coloured it in with a yellow colour.


No comments:
Post a Comment